You can create your own template-based member forms to enable you to quickly and easily capture & record ad-hoc information. This might be something like an on-boarding questionnaire; a likes-dislikes list etc.
Before adding a form to a member, you must firstly configure the form. You need only do this once, and then you can use it as many times as you wish. Member forms can only be setup by employees with manager privileges.
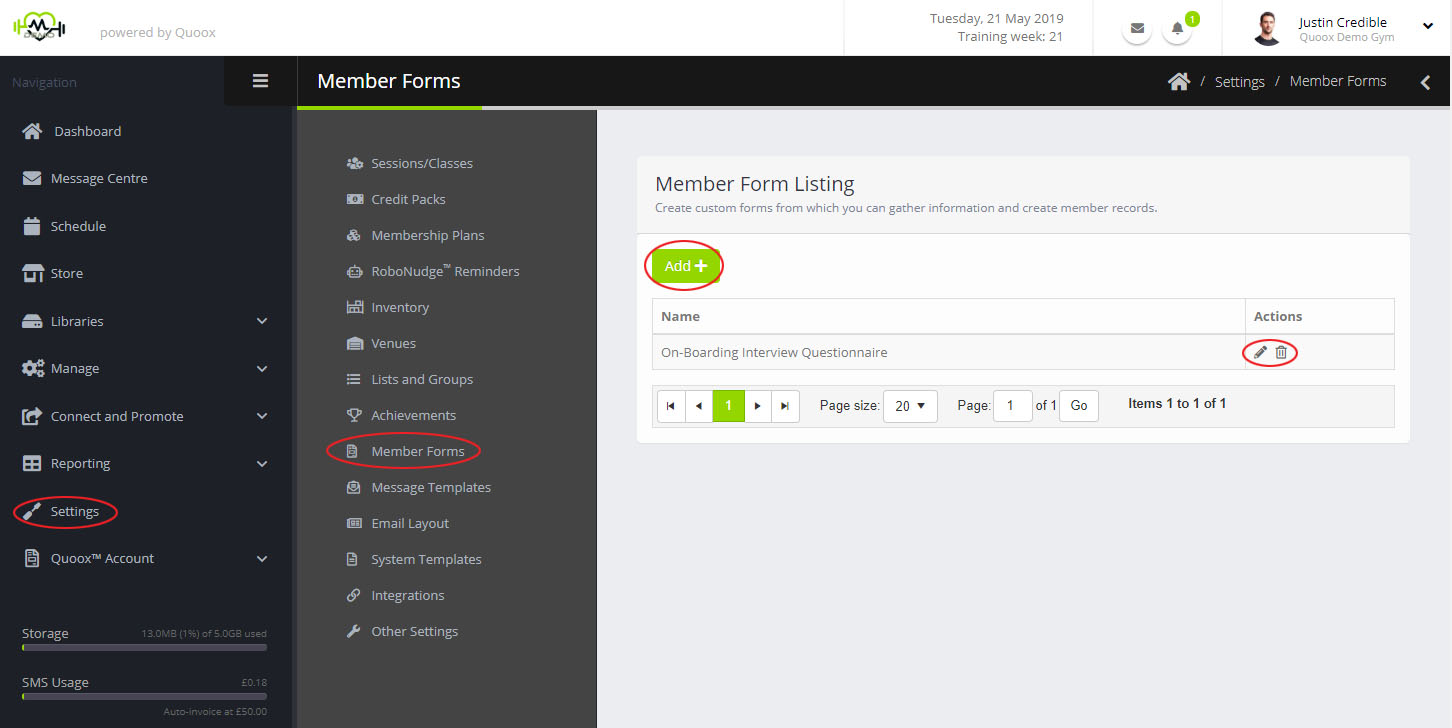
To setup a member form, select the Member Forms option from under Settings main menu. The list of existing forms will be displayed:
To add a new form, click the Add button. To edit an existing entry, click the corresponding icon. Click to delete a form.
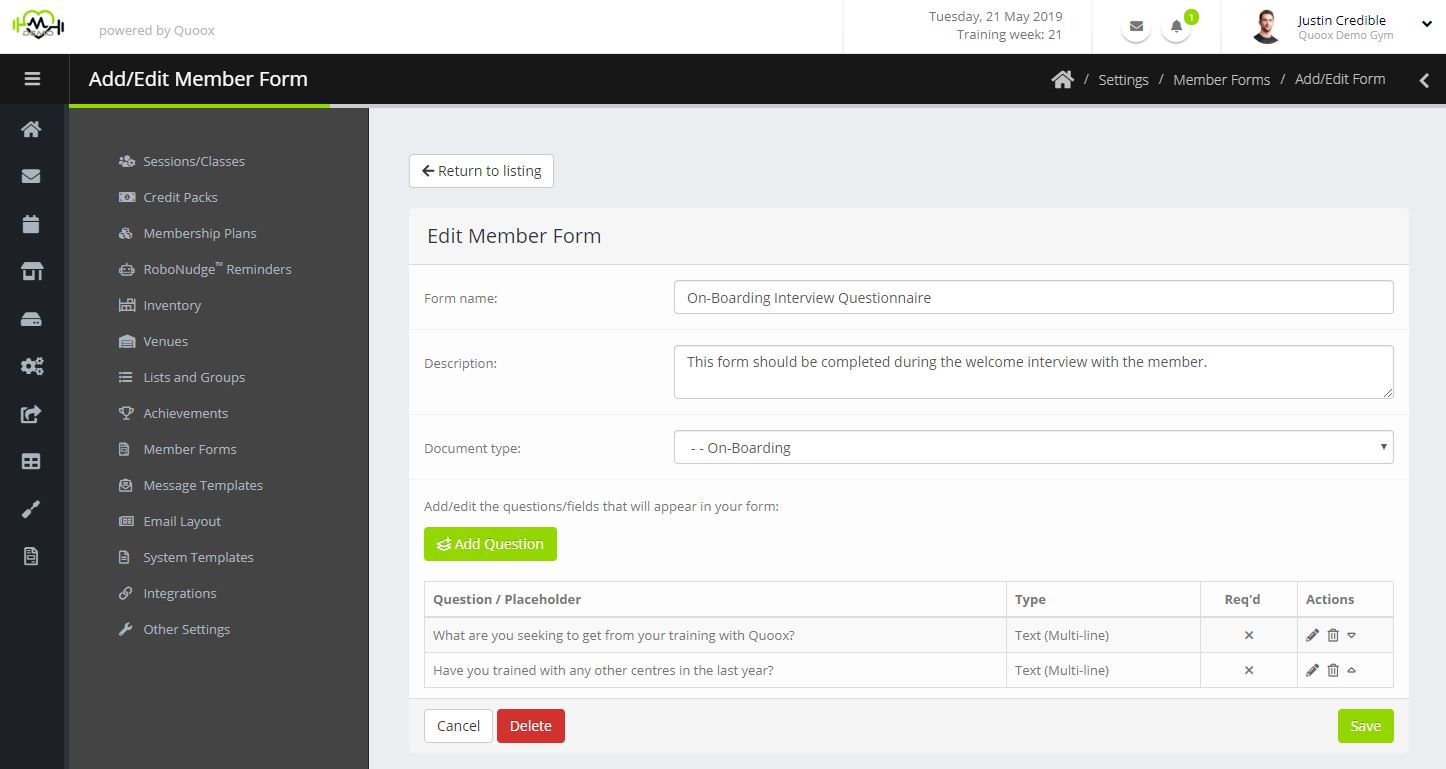
The screen for adding/editing a member form is shown below.
For the member form, you should provide:
- Form name – The name by which to identify this form (E.g. On-Boarding Questionnaire)
- Description – A summary description of the form and how it should be used
- Document type – The type of document that should be assigned to the resulting PDF file. You can add document types via the Lists and Groups section of the Settings menu.
Clicking the Add Question button enables you to add a new question.
Clicking the pencil ( ) icon against an existing question allows you to edit it, and the trash ( ) icon allows you to delete a question.
Use the and icons to adjust the order of the questions.
For each question you wish to appear on the form, you should provide:
- Question – The question itself
- Description – Some helpful guidance text to aid your employees complete the response appropriately
- Type – The type of response to collect,
- Text (Single line) – A single line response box
- Text (Multiple line) – A multiple line response box
- Required – A checkbox to indicate whether the question is mandatory, and thus a response must be provided
The and icons can be used to commit and cancel the edits, accordingly.
Clicking the Save button will save the form, and it will be available for immediate use with members.


