One of the first areas you should configure is your venue, or venues.
By default, when you registered, a venue will have been setup with the business address details you provided. If this is not correct you should edit this venue so that it’s at the correct location.
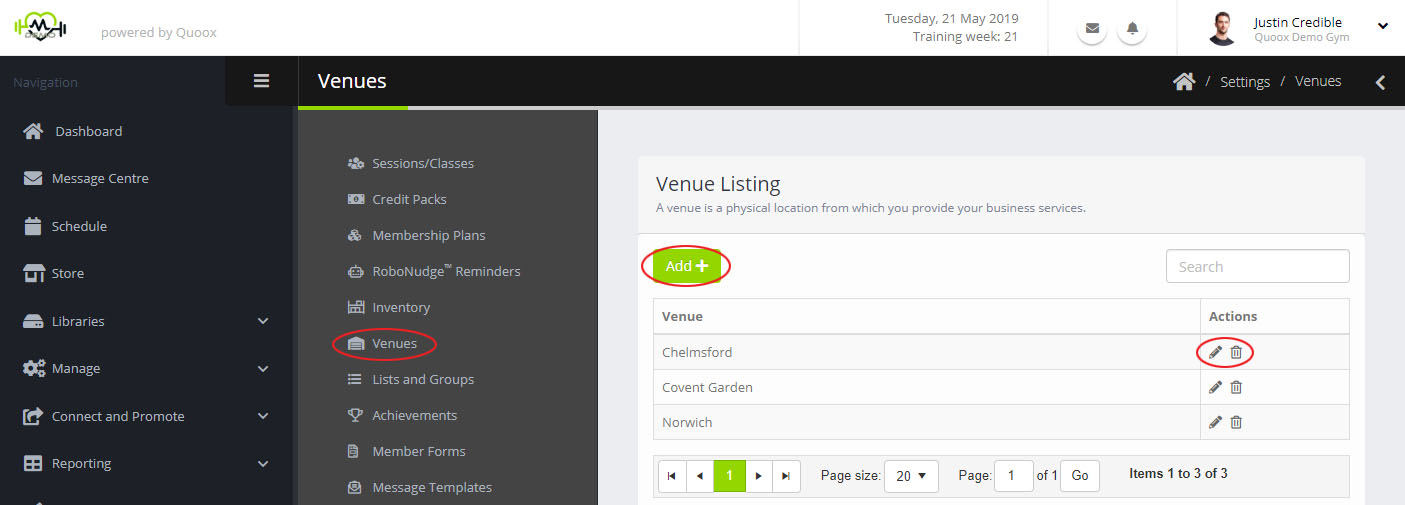
To setup your venue(s), select the Venues option from the Settings menu.
Your list of current venues will be displayed.
Click on Add to add a new venue. Alternatively, select to edit a venue, or to delete it. Think very carefully before you delete a venue, and any knock-on effects it might have.
Note: Quoox presently charges a small additional monthly fee for each additional venue.
Venue Details
There are a number of details that you should provide for each of your venues. This is for marketing purposes with your members, as well as for functional reasons.
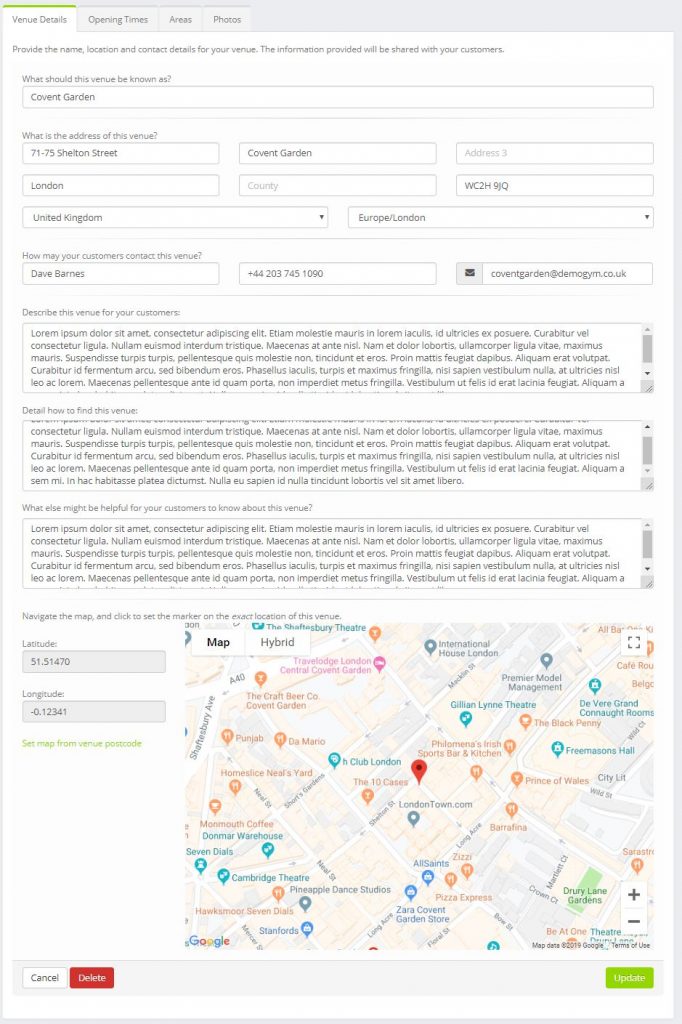
You should provide a logical, recognisable name for the venue. This might, for example, be the name of the location (E.g. London – Aldgate)
Enter the full address information, and provide a contact name; number and email.
Describe the venue and the facilities it has. This is displayed to your members, along with the other information, in the mobile app and member portal. This information could be useful in alerting members to other venues, where they might have friends they can refer.
Provide helpful information regarding how to find your venue, by car and on foot.
Add any extra information that you think might be useful to members attending this venue location.
Finally, and this is important, locate you venue on the map. This can be done by using your postcode, and then clicking on the map to refine the location.
This above latitude/longitude geo-location is used to help provide your members automated directions (via Google Maps), but also to correctly determine when your employees are on-site (for clocking-in/out purposes).
Venue Opening Times
Clicking the Opening Times tab on the venue will enable you to set the times during the week that the venue is open.
You can add as many different time spans as necessary to reflect your opening times. Quoox will order these correctly, and display them to your members via the Quoox mobile app, and the member portal.
Venue Areas
Provide details of the different training areas within you venue. It may be that there is only one area, but this still needs to be defined.
You can set the maximum capacity for the area, which is then used as the default for sessions held in that space. You may also override this on a per-session basis. You should give your venue area a meaningful name, and a brief description of where to locate it within your facility.
You can add as many different areas as you wish, and these are then available for selection in the session setup functions.
Venue Photographs
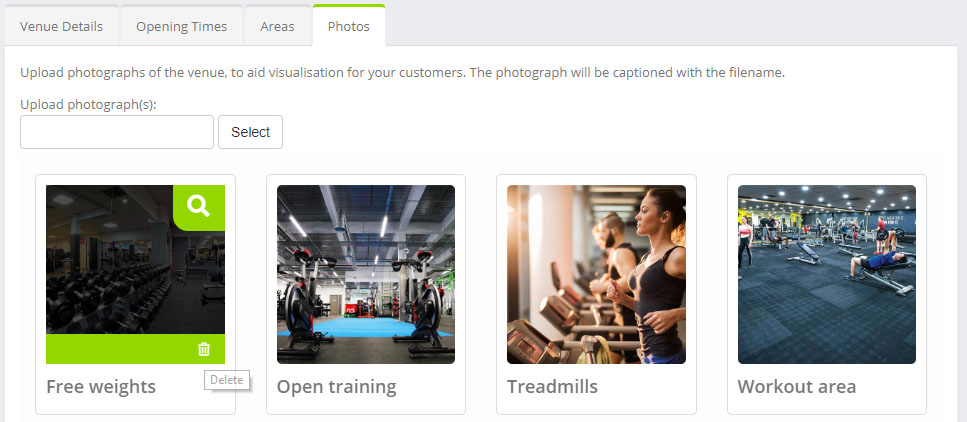
Within the Photos tab of the venue setup, you can add one or more photographs of your venue.
These photographs are shown to members in the Quoox Mobile App, and the member portal. Additionally, a photo is randomly chosen as the background to your self-service check-in kiosk.
To upload a photo, select the JPG or PNG image that you wish to upload. The Quoox system will resize the image for you.
TIP: The image caption is derived from the filename. So, if you call you file Free Weights.jpg, the caption “Free Weights” will be applied.
You can delete a given image by rolling your mouse over the image, and selecting the icon.


