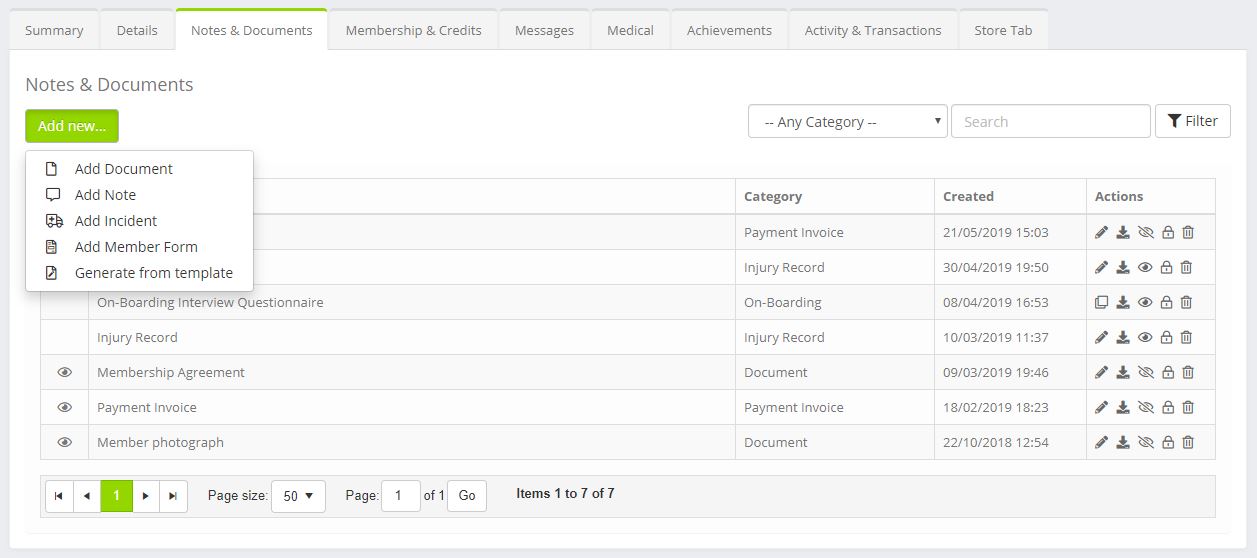
The employee Notes & Documents Tab is a mirror of the member version, and provides a wealth of features.
Existing documents are listed, providing:
- The document name
- The document category
- The date on which the document was last edited
You may filter the document listing by category and/or text contained within the name. Click the Filter button to apply the filter criteria.
Document Actions
A number of actions are available against each document (as applicable), and include:
- – Edit note/document
- – Clone member form
- – View document
- – Show/hide document from the staff member. The icon will be shown on the left of the document, if visible to the employee
- – Restrict the visibility of this document to managers only. The icon will be shown on the left of the document, if restricted to managers
- – Delete the document
Add a new document
It is possible to add a new document by clicking the Add new… button, and then selecting Add Document.
The file to be uploaded should be chosen from the computer. A category can be assigned, and you can also create your own categories.
The created date will automatically be the current date and time. Click the button to upload the file, or to cancel.
Add a new note
Adhoc notes containing any useful information you wish can be easily uploaded against the employee record.
To add a new note, click the Add new… button and select Add Note
When adding a note, the created date/time will be set to the current date/time. Enter your note details, clicking to save or to cancel.
Add a new Incident
It is possible to log incidents both against an employee, or generically.
To add a new incident related to the given employee, click the Add new… button and select Add Incident.
Provide details of the incident, and click to save your incident notes, or to cancel.
Incident notes added for employees also appear in the central incident log.
Add a new Member Form
Member forms are configurable forms that enable you to capture, in a structured form, any information you like about the member/employee.
To add a new member form, it must firstly be configured. You need only do this once. Click Add new… and then select Add Member Form.
The member form selector will be displayed:
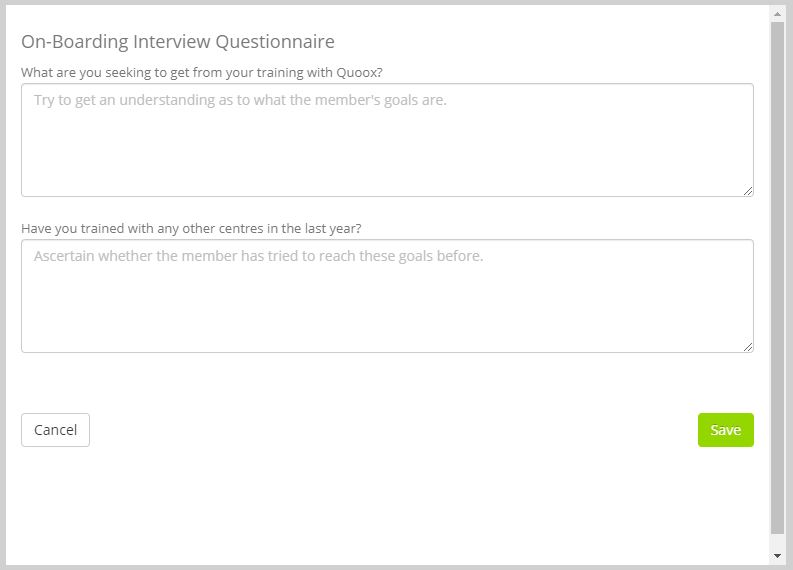
Click on the title of the form that you wish to add, and complete it accordingly:
Click the Save button to commit the information, and to generate the corresponding PDF document. You may view this document by clicking on the icon, or clone and edit a new version by clicking on .
Generate a document from a Quoox Library template
To generate a tailored library document, complete with the member’s personal information, click Add new… and then select Generate from template.
Navigate the list of available documents, finding the template you want within the relevant folder.
Click the Generate button alongside your desired template. A generating… message will be displayed. You should not click any other buttons until the template has completed generation. Typically this will take less than about 10-seconds, but might take longer for complex documents.
The document will be listed in the documents listing. You can make it available to the employee (via the mobile app and web portal), by clicking the icon.
You may download the PDF document by clicking the icon.


