The Quoox XRcize online training session builder is a feature rich environment for crafting multi-ability workout sessions for at home or on-your-own delivery.
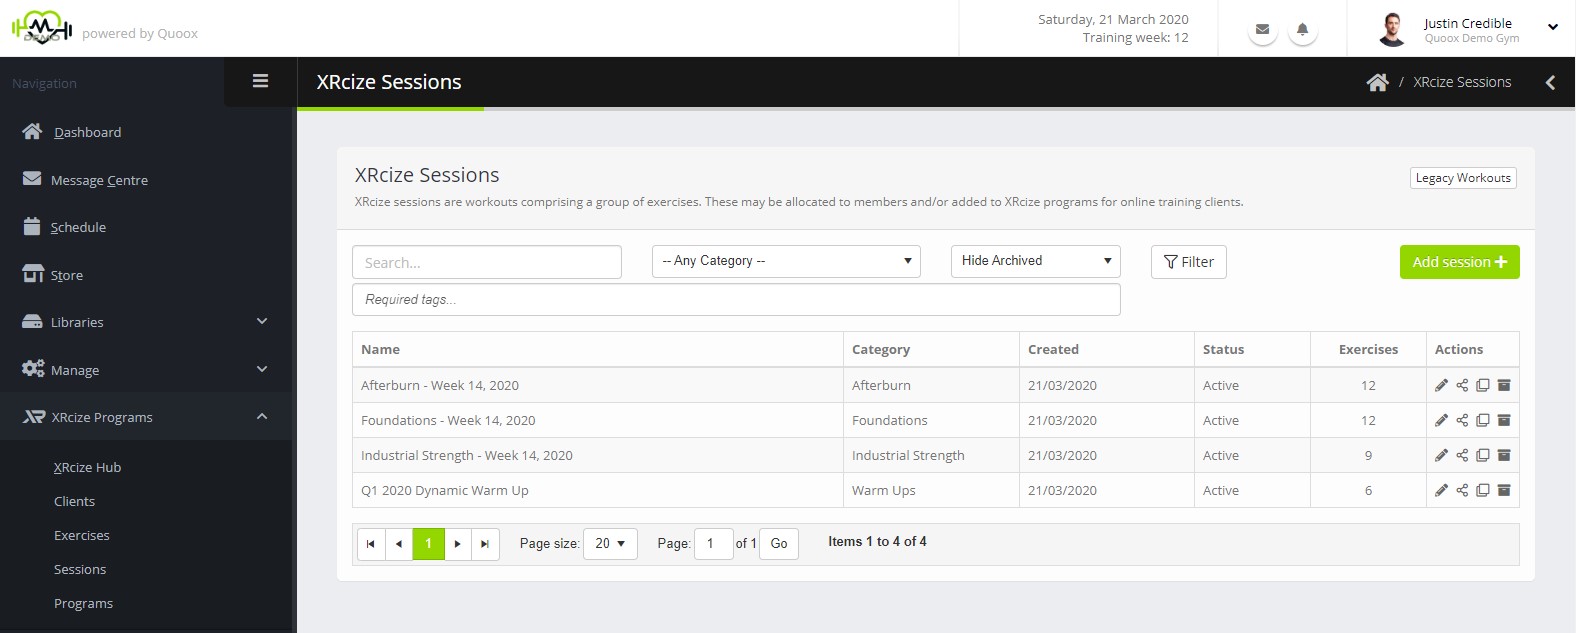
Sessions are accessed by selecting the Sessions option from under the main XRcize Programs menu. The list of existing sessions will be displayed.
It is possible to refine the listing by:
- Search – the session name must contain the given text
- Category – filter the session listing by category type. You can setup categories in settings
- Archived – show or hide archived sessions
- Tags – show only sessions that contain all of the specified tags
For each session, the information displayed comprises:
- Name – The name of the session
- Category – The category assigned to the session
- Created – The date on which the session was first created
- Status – The status of the session
- Exercises – The number of distinct exercise elements within the session
Links are provided for:
- – Edit the session
- – Assign the session to one or more members
- – Clone the session
- – Archive the session
Click Add Session will launch the new session screen, below. For an interim period, legacy Workout functionality may still be accessed by clicking the Legacy Workout button.
Create a new online training session
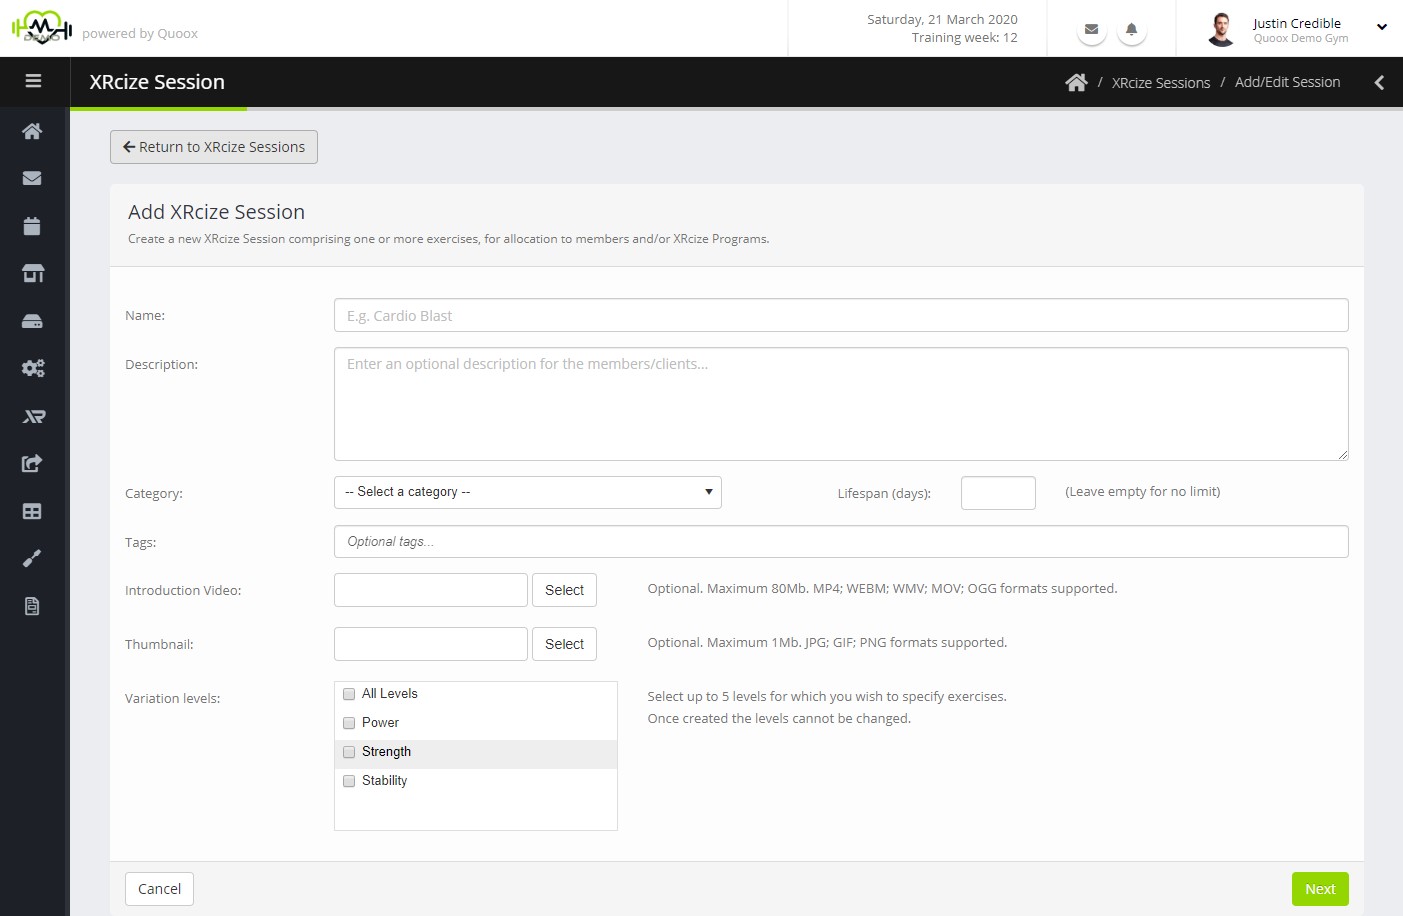
To create a new session, click the Add Session button. The new session screen will be displayed.
For each session, provide the following information:
- Name – the name for the session
- Description – a description of the session, what it comprises and it’s benefits
- Category – the category for the session. You may also add your own custom categories
- Lifespan (days) – Optional. The number of days for which the session should be made available to the member
- Tags – Optional. Add tags to classify the workout session
- Introduction video – Optional. Upload an introduction video (Max. 80Mb) that provides the member with an introduction to the workout session.
Quoox will process, convert and re-size the video such that it is suitable for use within the Quoox mobile app - Thumbnail – Optional. Upload an image that will be displayed alongside the session in the member’s mobile app. This may help identify the session or the type of session
- Variation levels – Select at least one variation level and up to a maximum of 5 levels.
For each variation level you will specify a variant of the exercise. This is a core feature that enables you to create workouts that suit members of multiple levels. You can configure your variation levels in settings.
It is not possible to change variation levels once they have been selected.
Clicking Save will create the base session, to which you can then add exercise elements.
Editing an existing workout session
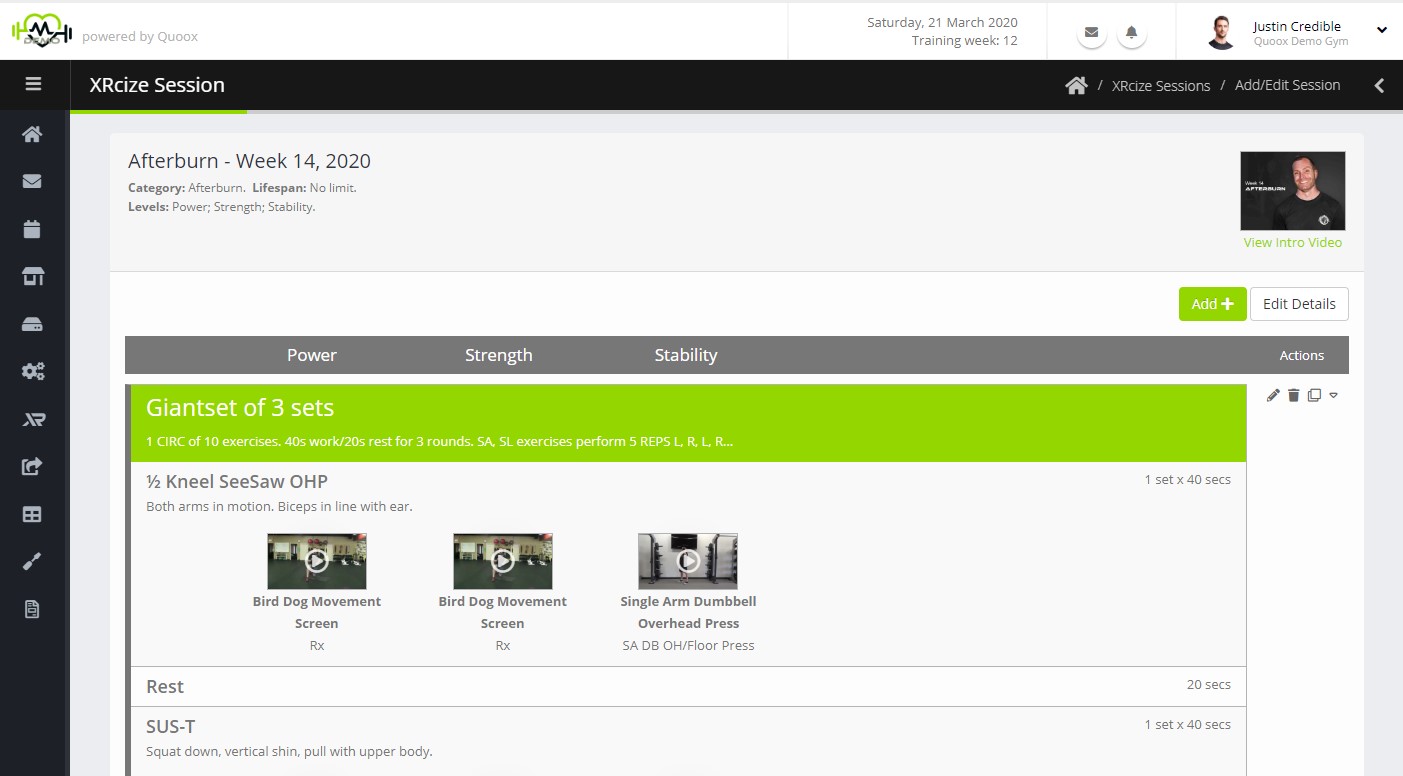
To edit an existing session, select the icon alongside the given workout. The session will be displayed in edit mode.
By default the base session details will not be displayed. However, these can be revealed and edited by clicking the Edit Details button.
A list of exercise elements will be displayed. For each element, options are provided for:
- – Edit the exercise element or superset
- – Delete the exercise element or superset
- – Clone the exercise element or superset
- – Move the element up the list
- – Move the element down the list
Clicking the Add button will open the exercise/set builder:
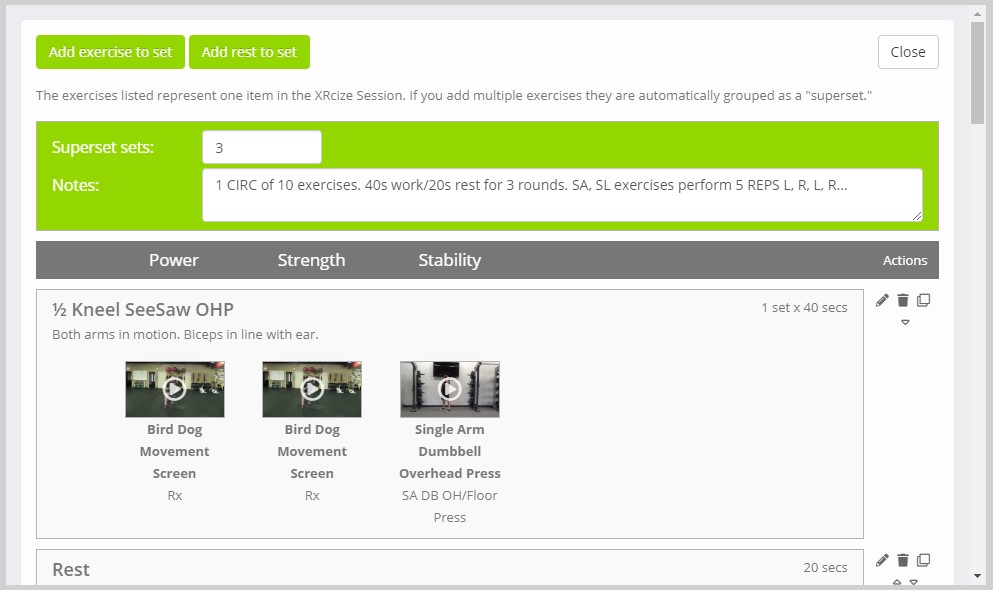
Understanding the exercise/set builder, and its power!
The popup exercise/set builder represents one element within the session.
If you add one exercise or rest element in the popup, it is one entry in the session.
If you add multiple exercises or rest elements into the popup, it automatically becomes a superset; tri-set; or giant-set. You may then specify additional parameters for the superset. The superset naming only counts exercises element, and not rest elements. Two exercises and a rest are thus a superset, and not a tri-set.
When you remove elements from the popup exercise/set builder, and you reduce to just one element, the superset aspect is automatically cancelled and it returns to being a single session element.
Adding a rest period
To add a standalone rest period, click the Add rest or Add rest to set button.
Select the desired rest time in minutes and seconds. To save your entry, click the icon. To cancel your entry, click the icon.
A rest period will auto-create a countdown timer that the member may use in the Quoox mobile app to time their rest period.
Adding an exercise
To add an exercise to a session or a set, click the Add exercise or Add exercise to set button. The exercise configurator will be displayed.
Quoox is able to store a wealth of information against a given exercise. Initially it may appear daunting, but you are unlikely to need all of the options at any one time.
For expedience, it is suggested that you start by selecting your exercises for each level. This will auto-fill the exercise title, which you may then override if you wish.
For each exercise, the fields provided comprise:
- Title – the name of the exercise
- Sets – Optional. The numeric number of sets to undertake
- Reps – Optional. Numeric or textual. The number of reps. E.g. “3”, or “AMRAP”
- Time – Optional. The duration for which the exercise should be performed
- Tempo – Optional. The tempo at which the exercise should be performed. E.g. “4/2/1”
- Rest – Optional. The rest period between each set of this exercise element
- Notes – Optional. Notes about this particular exercise
For each level you selected to configure for the session, the following fields will be provided:
- Level name – the name of the level to which the information applies
- – the level selector (see below)
- Hint – An optional hint as to how the exercise should be performed. E.g “Rx”
- Notes – Optional. Notes regarding this level of the exercise
To save your entry, click the icon. To cancel your entry, click the icon.
Selecting an exercise level
The exercise selector comprises:
You may optionally enter tags for which the exercises should match, and you should enter text into the drop down search box to refine the list of exercises.
Clicking will confirm your selection and configure the level in the exercise builder. Clicking will cancel the selection.
Previewing your exercise selection
Clicking will launch a preview of the selected exercise, so that you may determine that it is the one that you desire:
Creating a superset; tri-set; or giant set
In Quoox, creating a superset; tri-set; or giant set is easy. The popup exercise/set builder represents one item in the session. So, if you add multiple exercises/rests into the same popup Quoox automatically creates a superset from this.
When you create a superset, additional options become available. For the superset itself you may also specify the number of sets of the superset, and provide optional notes for the superset.
The exercise/set builder will automatically drop the superset element when you reduce to one element within the given popup.
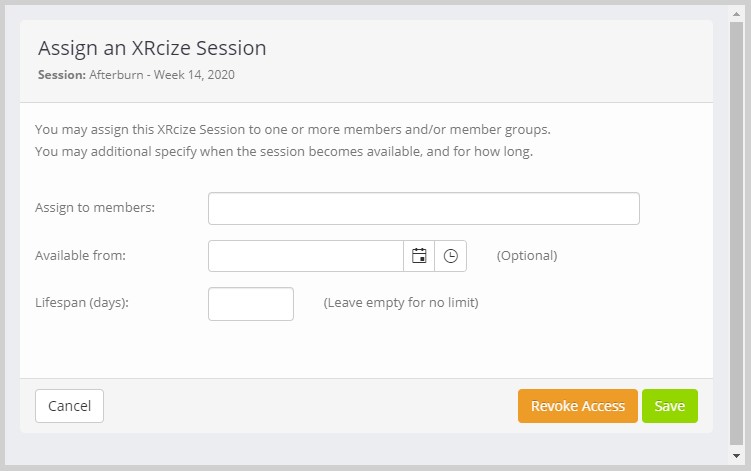
Assigning a session to members
You may assign a session to members by clicking on the icon alongside a given session. This will launch the assignment popup:
The information requested comprises:
- Assign to members – Select one or more members (or groups of members) to whom the session should be assigned
- Available from – Optionally set the date/time at which the session should become available in the member’s app
- Lifespan (days) – Optionally set the number of days for which the session is available. The session will auto-revoke and cease to be available in the member’s app after this time.
Clicking Save will assign the session. Clicking Revoke Access will revoke access from all members to whom the session is assigned.
To revoke access from an individual member, you may do so from the XRcize tab in the member record.
Tricks & Tips
Variation levels
There is a built-in trick to enable the ordering of variation levels within your exercise…
By default, the levels will be ordered alphabetically. If, in list administration within settings, you prefix your level with “[n]” (where n is a number), Quoox will use that number to order the results, yet not display the part in brackets within the session. So, “[1] Beginner” will appear before “[2] Basic”, whereas alphabetically, Basic would have previously appeared before Beginner.
